Creating Custom Signature Blocks
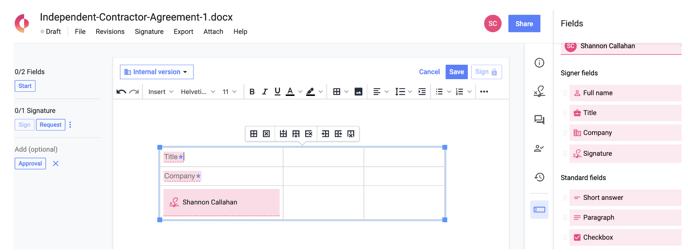
Document editors can create custom signature blocks with any desired fields, placing them anywhere within the document. If a signature block requires two or more columns, it can be organized using a table.
Note: If your document has pre-set signature blocks turned on, it is not necessary to create your own signature blocks within the document. However, you can do so, if you wish.
1. Create a table
- In edit mode, place your cursor where you want the signature blocks to be located in the document and select the table icon from the toolbar.

- Choose the number of columns and rows you would like to include in the table.
- To create a signature block with less vertical height between stacked fields, create a table with only a single row and insert all fields per signer into a single cell. Enter a hard Return between each of the fields to locate each field on its own line.

- Expand the table to a different size by clicking the bottom left-hand corner and dragging the table downwards.
2. Add fields to cells
- In edit mode, open the Fields panel by clicking on the Fields button from the right-hand column.
- In the 'Select an assignee' input, choose your first signer.
- Drag and drop the field into the desired table cell.

